Pages

Showing posts with label Taylored Expressions. Show all posts

Tuesday, October 7, 2014

World Cardmaking Day 2014 Cards

October 4, 2014, World Cardmaking Day is history. And I made history because I actually MADE cards!! Hunter and I spent the day at home being crafty, he made some of the cutest things with his Rainbow Loom and I worked on cards.
I am still using some past card kits and I am so happy to have just a few scraps where kits have been....for way to long!!
I had a kit featuring My Mind's Eye Meadowlark 6x6 paper pad and 5 beautiful colors of card stock and ribbon. The black and white designer paper paired with bright colors made for a lovely set of cards! I made 15 cards, 5 each of 3 different designs. The design part took some time, but then it was super easy and fast to mass produce each design.

I used lots of layers on these cards. I did add black card stock, and I am so glad I did. Look how it makes the colors pop.

 I used my lightest Copic marker to add a little color to the daisy petals. And you can not see it, but I added clear Stickles to the centers of the flowers. The stamp-a-ma-jig helped me to get the sentiments straight.

 When making sets of cards I like to leave the sentiments off of some of them. That can always be added later and makes it easy to build up a collect of cards ready to send when needed.

 Using coordinating dies makes having cut out images so easy, and you know how much I HATE to fussy cut!!:-) I like adding the black accents, it makes the black designer paper look like it "belongs."

Tip- I used the From the Heart die for my sentiment, it kind of got lost on the designer paper until I matted it with black. I cut the same exact die in black card stock and cut the die cut in half, my sentiment is matted on the top and bottom and it really doesn't matter that the sides are not matted. This is a great way to use your die cuts  to get more bang for your buck!
Again I added black details, the twine on the flower stem, the button and the sentiment mat.

 I added clear rhinestones to my butterflies I cut with a punch. (Wouldn't the butterflies be pretty with some swirls stamped on them before adding the bling?)

 These cards have added dimension with the flower being popped up (the stem is not attached to my cards, I tucked it beneath the ribbon.) the butterfly has the wings bent and glue applied to just the body so it looks like it has just landed and then the button. This is a card I will not mail, I don't want anything flattened in the mailing process.

One day, one stamp set and one card kit and now I have 15 new cards ready to go.
Supplies:
Card Kit, Oops a Daisy stamp set and coordinating dies, small scalloped die and from the Heart Die- Taylored Expressions
Black Pearls, Yellow Pearls and Rhinestones- Kaiser Kraft
Copic Markers, Diamond Stickles, pop dots, glue dots
Thanks for stopped by!!
Until later~

Wednesday, November 20, 2013

Christmas Tag Swap

I am a part of a great group of scrapping ladies. It is no secret that there is some serious talent in that group! We recently completed a card swap, and having the creative juices flowing decided to do a tags swap. We needed to make 10 tags, and I can hardly wait to get 10 tags back!

I did 5 each of 2 different designs. For my first tag I went "old school." LOL

I started with a pre-made tag that I have had in my stash forever. I stamped my image (one of my all time favorites!!) and colored with my Prismacolor pencils. I have used my Copics almost exclusively for the past 3 years and almost forgot how much fun it is to color with the pencils. I used some white Liquid Applique that I have been hoarding forever. Again, I had forgotten how much fun it is to play with that stuff! I love this tag! I hope the ladies do too!
Supplies- 
Stamp- Perky Penguins- Red Rubber Design, "To/ From"- Christmas Circles- Red Rubber Designs, "be merry" from my stash
Ink- memento Tuxedo Black, Vintage photo Distress Ink
Misc- Liquid Applique
Misc- white Liquid Applique, Prismacolor Pencils, Gamsol, Crystal Stickles, red rhinestones, red & white Bakers Twine

My second tag is a little more formal, and has lots of layers.


I chose to used lots of die cuts on this one, thank goodness for the Big Shot. I started with Spellbinders Labels 8 cut in Ripe Avacodo. I stamped it with a small snowflake with Versamark ink for a tone on tone effect. The scalloped circle and the "bookplate" were cut with the Make it Memorable dies from Taylored Expressions. I then used the Circles Spellbinders dies.(I love how dies from different companies work together so well!) All edges were inked with Landscape Palette ink. A tiny rhinestone and a little Ripe Avacodo ribbon finished my tag. Not only did I use lots of layers, but I pop dotted each of them too. I enjoy layering up my tag because I have to watch it on my cards.
Thanks for stopping by!
Until later~

Monday, November 4, 2013

Happy Birthday card quickie

Hey look, it is something other than a Christmas card!! I am still using We r Memory Keepers Winter Frost 6x6 paper pad collection. These are super quick cards, I only added the sentiment and a little bling. My tip today is to let the designer paper do most of the work for you!!


 (You can click on the photos to see larger views.)
Supplies-
Paper- We R Memory Keepers Winter Frost (December 2012 KI card kit from Taylored Expressions)
Ink- Jardin Moss- Palette, London Fog- Memento
Stamp- Think Big Favorites #13 PTI
Misc- Chocolate Pearls- Kaiser Scrapbook, Split Pea Rhinestones- Kaiser Scrapbook, Icicle Stickles
Thanks for stopping by!
Until later~

Friday, November 1, 2013

Peaceful Poinsettia

I have almost killed the Taylored Expressions KI Card Kit from December 2012, and it is only the first day of November 2013!! Woo hoo, go me!
After sharing a 5 minute card yesterday, I thought I would share one today that took just a little more time. And I am sticking with Winter/Christmas themed cards. (Even though this piece of designer paper could be used for any occasion.)

I am using the Peaceful Poinsettia stamp set, I love that this set has both the solid stamps and the line drawn ones. The solid ones are good for inking up, like I did here, they make mass producing cards very easy. And speaking of easy, I need to mention that there are matching dies!!


 Here is a peak at the popped layers. I like to die cut my cardstock first. Then I ink up my stamp and lay the die cut shape on top of the stamp. I don't mind that the image it not perfect, my work is handmade is a reflection of me- perfectly imperfect!!

Supplies-
Stamps- Peaceful Poinsettias- Taylored Expressions
Paper- We R memory Keepers Winter Frost
Ink- Memento Tuxedo Black, Palette-Jardin Moss, Cote d'Azure
Misc.- Poinsettia dies- Taylored Expressions, Classic Scalloped rectangle Spellbinders dies, Button twine, say it with Crystals rhinestone, Tattered Angels Glimmer Mist- Frost, pop dots, Stamp-a-ma-jig.
Thanks for stopping by!
Until later~

Saturday, October 12, 2013

Leaves are falling


Honestly, after the wind and rain last night I am surprised to see any leaves left on our trees! We had 45 mile per hour winds. I knew I would not be able to go to sleep with the constant roar of the wind so I took advantage of the situation and made a couple of cards.
I am finding lots of inspiration in card challenges that I am finding on-line. I also love to see what others are creating.
This sketch was yesterday's challenge on the Clean & Simple Stamping blog.


After coloring the images I used some Stickles, I really wish the camera would capture the sparkle and shine! This card came together sooo fast thanks to the coordinating dies! I LOVE dies!! Dies mean I don't have to fussy cut!!
Supplies-
Stamp- Falling for you (SOTM) Taylored Expressions and Coordinating dies
Ink-Memento Tuxedo Black
Copic markers- E31, 35, 57
Y17, 19, 21
C2
Stickles- Yellow and Icicle
Bazzill Cardstock, Dark Chocolate and Clay Cayon- PTI

Challenges-
Clean & Simple Stamping- 262! Sketch
4 Crafty Chicks- Crazy about wheels
Brown Sugar Challenge- #63 Anything Goes
Crafts 4 Eternity- R#145 Clean and Simple
Chocolate Coffee Challenges- Autumn NOT Halloween
Inky Impressions Challenges- IIC #129 Glitter and Sparkle

Thanks for stopping by!
Until later~

Friday, October 4, 2013

Sending smiles....

Today I am sharing another CASed card. You can see the original HERE. I did change it up slightly, I used a paper flower on mine and I didn't use any ribbon.

I used the September Key Ingredient card kit and Stamp of the month stamp set from Taylored Expressions. I used some colored ink, I really can not remember the last time I used something other than black or brown!! The I used was not a good match for the cardstock, but when I used the 2nd generation stamp technique it matched perfectly! (2nd generation stamping is when you ink up your stamp, stamp it on a scratch paper and then onto the paper you are using without re-inking. This gives you a lighter shade of ink color.)
When you cut your 8 1/2" x 11" cardstock you can get 4 mats from one sheet, so I went ahead and made four identical cards. I love the sentiment, it is perfect to send to the folks "back home."
Supplies-
Paper- We R Memory Keepers Chalkboard 6x6 pad,  Bazzill cardstock
Ink- memento Tuxedo Black, Orangerie Palette Ink
Misc- paper flower, Pearl- Kiaser Scrapbook
Yeah for quick cards!! 
Thanks for stopping by!!
Until later~


Monday, September 23, 2013

CASed card

Last week I saw a card on Taylored Expressions' Facebook page (<----click--->  Here is the link to the original card.) and saw this card that took my breath away!
 I was so impressed that I CASed the card. So here is my Popsicle Toes inspired card-

I love cards that come together quickly and still has the WOW! factor. This one would be easily massed produced too. The flower stamp is the September Stamp of the Month from Taylored Expression, love it! I was channeling my inner Kristie over at Kristie Kreates with the fussy cutting! HA! Yea, I am still not loving all that detailed cutting. LOL
Supplies-
Ink- Memento Tuxedo Black
Rhinestones- Kaisercraft Island Lagoon
Copics- Y11, BG10, BG15, R20, R24, YG03, YG05, C2
Thanks for stopping by, I appreciate it!!
Until later~

PS- CASed= Copy And Send.

Friday, September 13, 2013

Deconstructed Sketch Challenge 116- Fall Splendor

With the kids back in school I am trying to get in the studio more. I did not realize just how much I missed being creative until I got my fingers inky, and snapped the cap off of a Copic marker! (I tell you, those Copic markers are addictive! You will see in just a bit.)

You can see the sketch HERE. I had been looking through my stamps trying to find some inspiration when I am across Fall Splendor by Inkadinkado. I had yet to ink it up, so it was a good one to start with. I then hopped over to Deconstructing Jen for some layout ideas, as always I was not disappointed! For my final piece of inspiration I I looked to the August Taylored Expressions KI kit for some designer paper and cardstock.

Once I had all of my inspiration, I was able to begin coloring my stamped image. Oh my goodness, I rediscovered my love of Copics AND coloring!
I am not lying when I tell you Copic markers are addictive, just look at how many I used on this one image.......
Yikes!! There are over 20 markers there! I like the angle of the card in this photo too, you can see that the image actually overhangs the front of my card. (The polka dots seen in the previous photo is the inside of the card,) I think it turned out pretty cute considering how rusty I was. LOL
I am looking forward to using more Copics, and ink, and stamps, and pretty paper.........well, you get the idea.
Supply list:
Stamp- Fall Splendor Inkadinkado
Designer paper-We R Memory Keepers Happy Campers and Coordinating card stock from the August KI kit from Taylored Expressions
Ink- Rich Cocoa Memento
Button twine
Pearls- Kaiser Chocolate
Copic markers- YR15, 24, 02, 12, 65, 18, 14
E53, 55, 57, 59, 43
R22, 24, 27, 05
V12, 15, 17
YG09, 13, 63
Y19, 21, 32
0
I used a Copper mist on the inside of the card.
Be sure to visit these links for some inspiration of your own. 
 
Thanks for stopping by!!
Until later~

Friday, October 12, 2012

LOAD Challenge Day 6-

I just finished another set of cards, this time using the Taylored Expressions Key Ingredient kit for September. I am proud to say I have added 12 new cards to my card box. (This time I did not add any cardstock, I used what was in the kit.)
 The September kit included a 6x6 pad of My Mind's Eye The Sweetest Thing Tangerine papers. I fell head over heels for all of the pretty colors and papers in this collection. (There are 2 of each design in this pad.)

 Don't you love the colors?

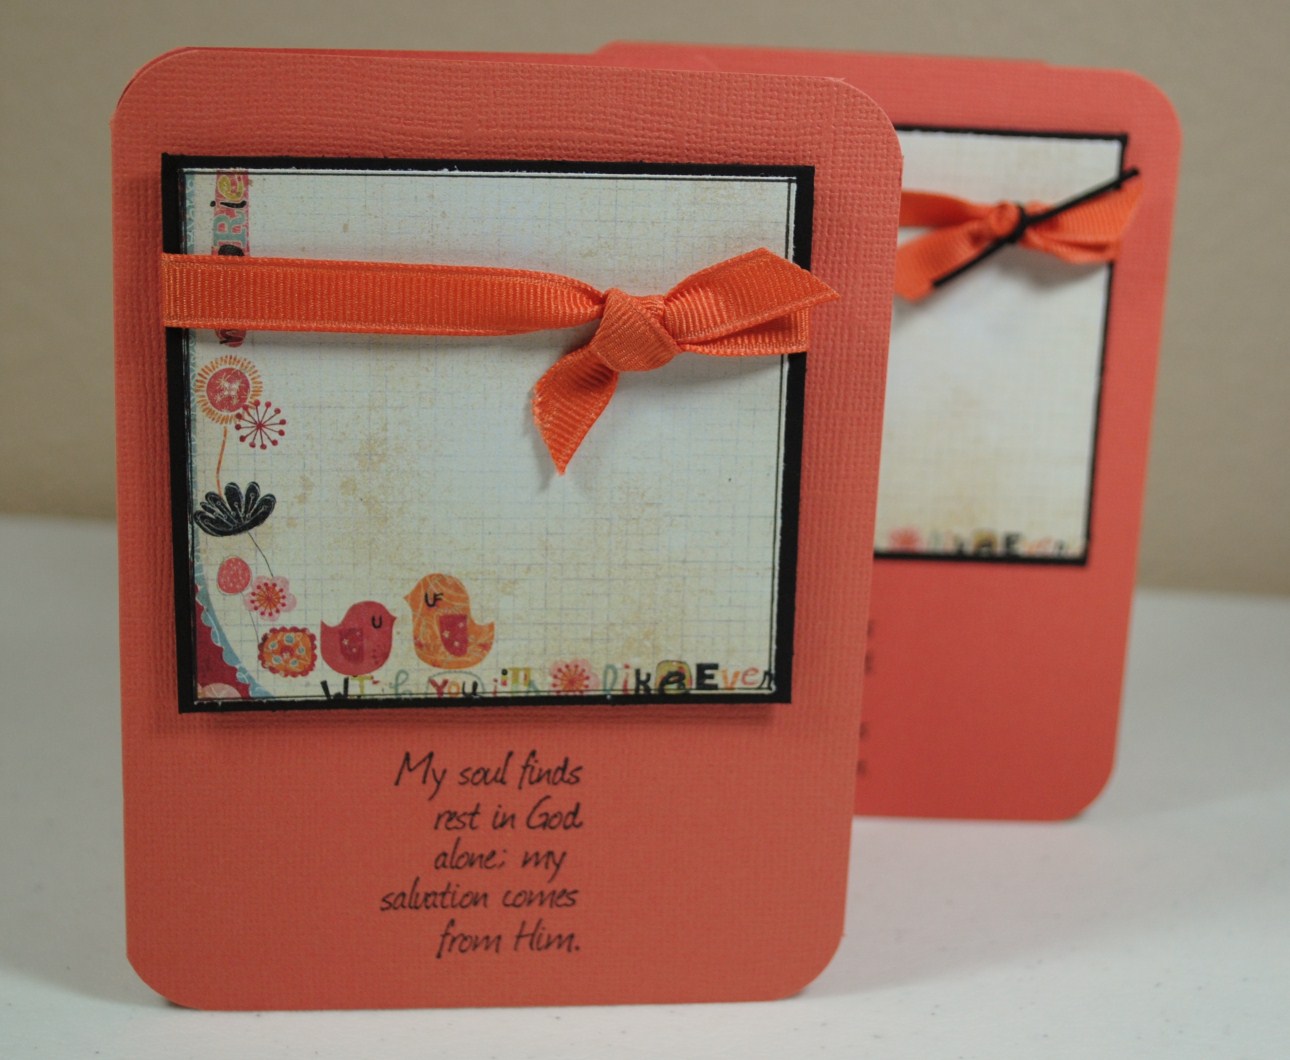
 This is my "Faux Pocket" card. The card front was made to look like a pocket with an insert. I used the Oops A Daisy stamp set from Taylored Expressions. (This is the set I won during a new release a couple of months ago!! I LOVE this set, and the coordinating dies makes cuting out the flowers and leave easy as pie!!)
The sentiment is from an older set I picked up at Hobby Lobby some time ago. 
The flower was colored with Copic markers.
The half pearls were included in the kit.

 I don't usually use much gray when I am making cards. But, just look how pretty that wood grain paper is!! The stamp set on this one is Daisy Bouquet. And More Copic Marker coloring. I tied the bows using the Bow Easy.

 The flowers on these cards have been pop dotted for more dimension, and I went for double bows.

 I think these are my favorite cards in this set. I used a large daisy and pearls on one card, and a small daisy and pearls on the other. That changes up the design just a little.
(The card I copied can be found HERE.)

 I used one of Jen's sketch's for this layout. I had to bling mine up a bit. LOL I added the flower and the rhinestone swirl. (I really wish I would have had a pearl swirl!)

 These were the easiest to make. I used the text boxes from the paper. I think the big pearls keep this design from being too boring.

I used the same papers on both of these cards. The teal plaid was the back side of the floral pattern. The orange polka dot was the back side of the ledger paper. It is hard to see, but I stamped the solid daisy from the set with some shadow ink. I then stamped a sentiment over it. 
The wooden buttons were in the kit, I just added a little twine.
I am so hooked on kits, it is so good to have everything already coordinated for you. AND I love trying new products- like the wooden buttons in this kit. AND because there are no Local Scrapbook stores around it feels like Christmas each month when the kit arrives.
OK, gotta run. I need to catch up on my LOAD for October Challenge!!
Thanks for stopping by!!
Until later~

Wednesday, October 3, 2012

October 2012 LOAD-1

I have joined the challenge over on Let's Scrap. It is a LayOut A Day challenge. We are to make a layout, card or mixed media project every day for the month of October. I decided I would start the month off by 1.) making some cards and 2.) using some of my Taylored Expressions Key Ingredient Kit card kits that I have been collecting. The August kit was a good one to start with- one of the "ingredients" was a roll of Trendy Tape (something I have been wanting to try.) So I got to work making cards and now I am so excited to have an assortment of 21 new cards!! TWENTY-ONE!! Can you believe it??!! (I did add a couple of pieces of ivory and black cardstock, but all of the other paper came from the kit!!) This collection of cards was made pretty quickly, some designs I made 2 identical cards and some designs I made 3. (3 is a good number when working with 6x6 pads because there are usually 3 sheets of each design.) I also limited myself to a couple of dies, stamp sets, Copic markers and embellishments, that saved me a lot of time!

It is hard to get a good shot to show that many cards.

 Lots of pretty cards.

 I used the Faith in Bloom stamp set for the sentiment and die cut it with a Spellbinders label die. I like how the black scallop border really "pops."

These are pretty simple, I rounded the bottom corners and add a little ribbon and some Prima flowers to finish them off.

I used the Faith in Bloom set again on this trio of cards. I used 3 different Spellbinders die sets for the sentiment. (The black borders was the leftovers from the scallop border on the first set of cards.)

I used Copic markers to color my flowers, and stamped a sentiment on yet another die cut. The sentiments are matted with black and the designer paper was matted with a light blue before adhering it to my ivory card base.

I found this card design on the the TE web site. Don't you love the black polka dot Trendy Tape? I am hooked on that stuff!!

This pair of cards are very simple. I popped the designer paper up on pop dots and added some pretty ribbon.

I used the Onesie Twosie set for these cards. (The onesie die get 2 thumbs up from me!!) I put the Trendy Tape on a scrap of white cardstock before die cutting it with the small scallop border die. The center onesies are popped up.

I trimmed the designer paper to keep the saying. (I'm lucky to have you in my life) I cut the black cardstock with the Majestic Border Die, and added some Trendy Tape, for yet another quick and easy card.
I hope you are inspired to make some quick and easy cards!
Thanks for stopping by!
Until later~

Saturday, July 14, 2012

Oops a Daisy

A couple of months ago during the monthly release, I won this stamp set from Taylored Expressions!! Woo Hoo!! I was so excited because I had never won anything before. Let me tell you,  I can not tell you how much I love this set.


Oops A Daisy


Oops a Daisy has both line stamps and solid stamps of the flowers. For this card I wanted to color the flowers, so I went with the line drawn flower. The good thing about this image is it is a very quick one to color or you can really spend some time and add a lot more detail.

I stamped the Daisy with black ink on white cardstock, colored them with Copic markers and finished off with some Diamond Stickles. I fussy cut them before adhering them to my card. (I fussy cut the flowers because I was too impatient to wait for the die to make it's home in my studio.) The stem and leaves are individual stamps which makes placement super easy when creating a bouquet. Because they are separate you can use a different color to stamp them. 

Oops A Daisy Dies (set of 4) 
I have stamped and cut several of these pieces and let me tell you, I much prefer the dies to fussy cutting!! But you already knew that, huh? LOL
 
Thanks for stopping by and taking a look!! I appreciate you!
Until later~


Friday, July 13, 2012

Spring Cottage

I love the series of house stamps being released over at Taylored Expressions! I knew instantly when I saw this darling little cottage that I had to have it. 


Spring Cottage is paper pieced with small accents added with Copic markers. (Did you know you can use your Copic markers to color on designer papers? Pretty cool, huh?)
I used several dies to complete my landscaping, the Picket Fence border die, Fresh cut grass (which I cut twice and layered) and the Die-namics Cloud trio. 
I wanted my scene to look like a page from a child's story book, something without a lot of "fancy" details. (The small strip of blue was left at the bottom until I decided if I was to stamp a sentiment there or just trim it off.)


For the inside I stamped the cottage image again, leaving it uncolored this time. I added a couple of die cuts, continuing the look from the card front. I will added a sentiment to the roof of the cottage later, when I am ready to mail my card. I think even with the inside finished I still have ample room to add a personalized note. 
Thanks for stopping by!!
Until later~


Tuesday, December 27, 2011

2011 Christmas cards

Here are the cards I made for Christmas this year. (This year instead of making all of our cards I just stuck with a more manageable number and only made 30.) I used the Taylored Expressions Joy to the World stamp set. And since I had to order the stamps I went ahead and got the Christmas card kit from there too. (I would highly recommend the card kits. I did add some kraft cardstock card bases to help stretch the kit items. I was able to make all 30 cards and I still have plenty of the 6x6 papers and some cardstock left over for other projects.) I like the kit because everything is coordinating and takes the guess work out of matching. I used Copics to color my angels. (The most time consuming part of the process.)

I used the Spellbinders Labels 10 to cut some of my images other were cut with the Ovals dies. I rounded the top 2 corners on the card base and on my layers, and then added a knot from some of the ribbon included in the kit.


 Some of the the cards. I like that they are all unique, but still similar. (This helps make assembly line card making less boring. LOL)

This one was cut with Labels 8 (?) The sentiments were stamped with Ranger Distress ink in Barn Door.
I am very happy with the way they all turned out. 
I am looking forward to being a little more crafty now that Christmas is over.(Crazy as it may sound, I am still in the crafty Christmas mood, so don't be surprised if Christmas crafts pop up again in the near future. LOL)
Thanks for stopping by!
Until later~