Pages

Showing posts with label Copics. Show all posts

Friday, August 29, 2014

Cards, cards and cards

The first week (well, half week) that the kids were in school I spent some time in the studio. Let me tell you, I had no idea just how much I had missed being all crafty until I had time to do it again!
I used one main image stamp, 5 coordinating colors of cardstock and inks and some sentiments to create 10 multipurpose cards.

 Here is a peek of 8 of the cards- I used 2 right away.

 Here is a close up.
I used Blended Bloom from Stampin' Up and the 2013-15 In Colors cardstock and ink.
After stamping the images on white cardstock I used coordinating Copic markers to color them.
I used the the matching In Color inks to stamp the image on my color cardstock for a tone on tone background.
I LOVE this flower and I have a feeling I will be using this stamp way too often!! :-) 
Thanks for stopping by!
Until later~

Monday, September 23, 2013

CASed card

Last week I saw a card on Taylored Expressions' Facebook page (<----click--->  Here is the link to the original card.) and saw this card that took my breath away!
 I was so impressed that I CASed the card. So here is my Popsicle Toes inspired card-

I love cards that come together quickly and still has the WOW! factor. This one would be easily massed produced too. The flower stamp is the September Stamp of the Month from Taylored Expression, love it! I was channeling my inner Kristie over at Kristie Kreates with the fussy cutting! HA! Yea, I am still not loving all that detailed cutting. LOL
Supplies-
Ink- Memento Tuxedo Black
Rhinestones- Kaisercraft Island Lagoon
Copics- Y11, BG10, BG15, R20, R24, YG03, YG05, C2
Thanks for stopping by, I appreciate it!!
Until later~

PS- CASed= Copy And Send.

Friday, September 13, 2013

Deconstructed Sketch Challenge 116- Fall Splendor

With the kids back in school I am trying to get in the studio more. I did not realize just how much I missed being creative until I got my fingers inky, and snapped the cap off of a Copic marker! (I tell you, those Copic markers are addictive! You will see in just a bit.)

You can see the sketch HERE. I had been looking through my stamps trying to find some inspiration when I am across Fall Splendor by Inkadinkado. I had yet to ink it up, so it was a good one to start with. I then hopped over to Deconstructing Jen for some layout ideas, as always I was not disappointed! For my final piece of inspiration I I looked to the August Taylored Expressions KI kit for some designer paper and cardstock.

Once I had all of my inspiration, I was able to begin coloring my stamped image. Oh my goodness, I rediscovered my love of Copics AND coloring!
I am not lying when I tell you Copic markers are addictive, just look at how many I used on this one image.......
Yikes!! There are over 20 markers there! I like the angle of the card in this photo too, you can see that the image actually overhangs the front of my card. (The polka dots seen in the previous photo is the inside of the card,) I think it turned out pretty cute considering how rusty I was. LOL
I am looking forward to using more Copics, and ink, and stamps, and pretty paper.........well, you get the idea.
Supply list:
Stamp- Fall Splendor Inkadinkado
Designer paper-We R Memory Keepers Happy Campers and Coordinating card stock from the August KI kit from Taylored Expressions
Ink- Rich Cocoa Memento
Button twine
Pearls- Kaiser Chocolate
Copic markers- YR15, 24, 02, 12, 65, 18, 14
E53, 55, 57, 59, 43
R22, 24, 27, 05
V12, 15, 17
YG09, 13, 63
Y19, 21, 32
0
I used a Copper mist on the inside of the card.
Be sure to visit these links for some inspiration of your own. 
 
Thanks for stopping by!!
Until later~

Wednesday, May 11, 2011

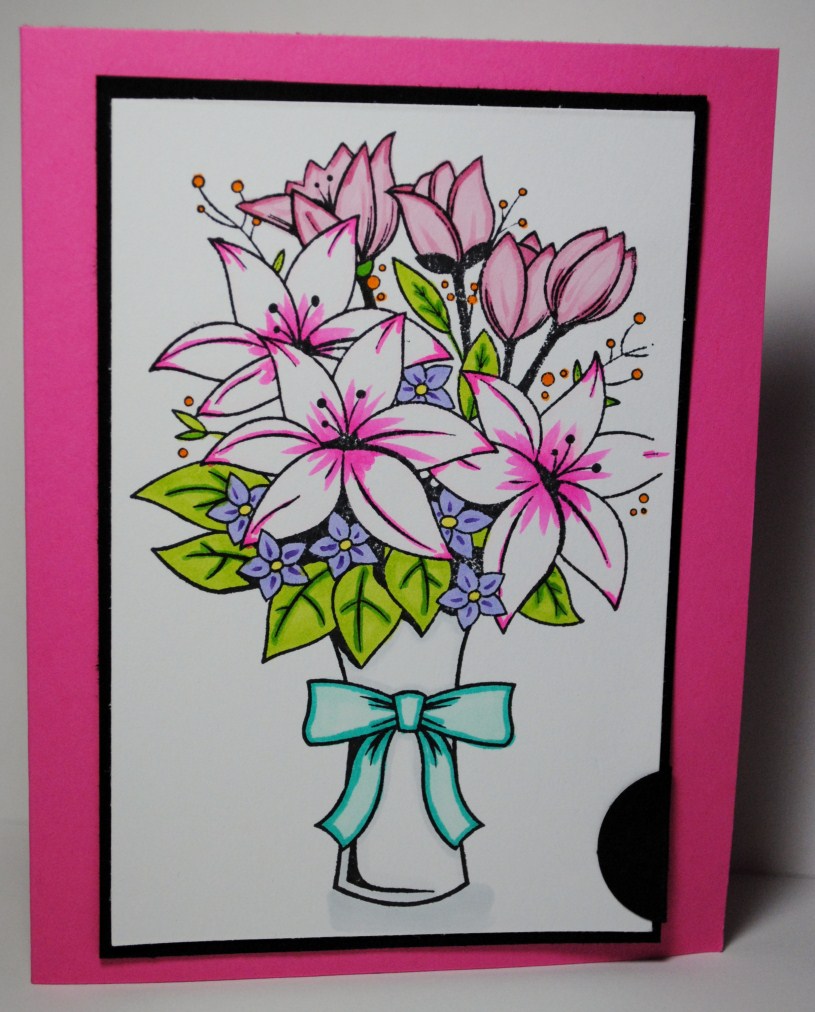
Flower Vase

This is the new Inkadinkado Cling stamp. There are a couple of small flowers in this set, but I think this image steals the show!! LOL Look how big it is, it is huge. I was just playing around with my Copics  and added a little Sakura Gel Pen too.
Thanks for stopping by!!
Until later~

Wednesday, March 2, 2011

Coloring "transparent" things with Copics

The class I took this month was using Copics to make things look transparent. This is a fun technique and really adds a lot of dimension to a stamped image.We used the balloon stamp, but it work well with other images too.
We started by coloring the balloon in the front and worked our way back. Um yeah, I really need to work on circles!! (The pink balloon has a flat side. LOL) Not too shabby for my first try at this technique. =) {I love the cord used on this one, it is wired, so it holds it shape so well.} "Celebrate"  and scalloped layer were cut with the Cricut. All edges were inked with Vintage Photo ink. Matted image was pop dotted.

LOL, still need work on the pink balloon, not sure what is going on with the deformed side. (I forgot to ask, but I think the sentiment layer was 2 brackets welded together and cut with the Cricut.)
Ok, a little better. LOL There is no way this technique could be pulled off with water based markers, the colors would turn out "muddy" (because you layer your colors) and the paper would pill. That pretty green ribbon started off  white, love coloring accessories with Copics, they are a perfect match every time. =)
 These 3 images were colored during class, after I got home I had to finish my "homework" and I wanted to play around a little with the technique, so....
This time I colored from the back forward, I started with the green one and ended with the blue one. As you can see, there is not much difference no matter which direction you go.


 I love this one, it's may favorite!! As you can see Hailey needed to practice her coloring too. ;-D Precious!!!
Thanks for stopping by!!
Until later~

Friday, December 3, 2010

Coloring white with Copics

We are full swing into the Christmas season and we all know how easy it is to lose track of time. Seriously, Thanksgiving was over a week ago!! How can that be?!
Today I am sharing 3 cards, in our  Copic Card Class last month we worked on coloring white. Sounds pretty easy, right? (I know some of you are thinking, you just leave it white and call it done. LOL) The thing about white is you still need some color, like where there are shadows and such. We had 3 options to color white- Cool Greys, Warms, and blues. I used the Cool Greys (C00 and C0) to shadow my polar bear. (I know it gets a little washed out when photographing it, but believe me, you can see it in real life.)
We used the Jillybean Soup- Christmas Chestnut Soup designer paper. (Two thumbs up for kraft designer paper!!)
 I love the addition of the flat backed pearls on the designer paper.


 This is a pocket card. This one would be perfect with  a gift card attached to the pull out insert.


 The pearls were used again on this one - see them on the deco edge? (A nice way to use your border punches, layer them.)
A tag was added to the twine on this one. (Tags are always an extra special way to add your sentiments to your cards.)


I am in Christmas card making mode now, why is it so hard to decide on a design.. or two?
Thanks for stopping by!!
Until later~

Sunday, October 3, 2010

TAC- Hello Day

Hailey loves, loves, loves this little girl and kitty stamp. I think it is because of the darling little kitty wearing his shades. Seriously, who does think he is adorable?? I have to admit that I love, love, love this stamp too. It reminds me so much of my precious little Haileybug and Garfield our new little kitty. Just any day I expect to see Garfield (I call him Jr.) wearing a pair of pink, sparkly princess sunglasses- totally against his will. He has already been driving the blue Barbie Volkswagen- against his will. He has taken many a laps in the yellow and orange plastic shopping cart-against his will. He has been rocked and sung to, wrapped in a baby blanket and and carried in a baby basket- all against his will. So, yea, just any day he will probably be wearing his shades. (If it happens I will try to get pictures. LOL) But the funny thing is just like the cat on this stamp, I don't think he minds at all!! =)
 I am so excited that The Angel Company has a lot of these types of images now. Images that are perfect for coloring. (If you haven't seen the new TAC catalogue you have got to take a peek!!)
 The sentiment is a retired TAC stamp that I still use quite often. =) The image was colored with Copics and Glossy Accents was added to the glasses.
Thanks for stopping by!!
Until later~

Friday, September 10, 2010

Birthday Fishes

I ♥ these little fishes. I combined a few of my favorite things on this card, the Cricut, stamps and Copics. =) (The fish bowl was cut from the Doodlecharms cartridge.) This is one of Hailey's favorite cards. She has been  working in the studio with me quite a bit since brother is in school now. I am so happy we can work together on crafty stuff. (She placed her very first stamp order this week. She even used her own money, she is already starting down the card making path. LOL)
 Thank you for stopping by!!
Until later~

Thursday, September 9, 2010

Beep Beep

I must admit I love the colors on this card, I think it would be prefect for a little boy. I thought the paperclip would tie in nicely with the robots. =) The nuts and bolts on the card base were heat embossed with some sparkly embossing powder.
  Thanks for stopping by!!
Until later~

Wednesday, September 1, 2010

Copic Skin tones

Working with Copics not only takes a lot of practice, but a lot of experimenting- you know, trying to find colors that work together. Skin tones can be very tricky, because there are so many skin tones in the real world. Sunday was another Copics class and this time we worked on skin. We used E000, E01 and E11 on all of these samples, but as you can see they still look different.

Because I used a lighter hair color on this one I  went with more of the E000, the lightest shade in this trio of colors. (Shading and blending works best for me when I use 3 shades- a light, mid-tone and then a darker tone.) I like to start with my darkest color and add my shadows first, then the mid-tone to soften the edges of the darker color. After I have those 2 colors- then I can use my lightest color where the "light source" would hit the subject. For me it works best this way and I don't over blend my colors.)
Here are the same markers, but, I used just a touch more of the E01 on this one. I like to use more of the darker shades with darker hair. (I like to color the hair first since it can be tricky. I don't feel so bad if the hair doesn't work on an uncolored image- but I DO mind when the hair doesn't work on an image that has already been colored. LOL)
I love the peachy complexion achieved when using these 3 markers- perfect for children. (I used the white gel pen to add a little highlight to her cheeks- Hailey asked why the little girl was crying. I guess it does look like she is crying over that little bird.)
I have colored some samples so I can keep track of my favorite combinations, I have made sure to write down the markers used on each one.
 Thank you for stopping by!!!
Until later~

Sunday, August 22, 2010

August Blog Hop

I am so excited today, this is my very first Blog Hop!! Over on Paper Wings the theme for this month is FALL. I ♥ Fall!! (I know I have told you that before, but I really love Fall!!) Not only was the theme enough to motivate me to "hop" along this month- but, I got some new rubber last week that is perfect for this hop!! (Confession time- Halloween is NOT my thang!!  I am afraid my that fellow Angel Barb just hit the floor, after all she is the Halloweenie Queenie!! LOL)
So are you ready for the most "un-scary" Halloween card ever???

 Isn't she a cutie??!! (I will have more info on this stamp set later.) She reminds me of my Hailey, all glittery and cute!! LOL
Supplies-
Stamp- Delightfully Spooky*
Ink- Memento Tuxedo Black
Paper- Miss Moxie designer paper* and Coordinating Orange cardstock*, Black cardstock
Misc- Miss Moxie Ribbon* {Embossing folder and glitter from my stash} and Copic Markers*
Products available from The Angel Company
Now- I encourage you to do a little hopping on my sister Angels' blogs to see what they have created.  Be sure to leave them a little love.
Shirley
Angie
Christine 
Angela 
Seleise
Laurie
Julie 
Rita W. -
Michelle 
Betty
Carol
Heather
Candi 
Kim 
Until later~

Thursday, August 19, 2010

Hair by Copic

I have been taking Copic coloring classes this year at my favorite local scrapbook store, Pizazz It! Scrapbooks. In our most recent class we worked on coloring hair. Coloring hair is pretty similar to coloring anything else, but I did pick up few pointers. I find it easier to start with the darkest color when working on hair, and use the feather technique instead of the small circle strokes. And Copics do not cover gray... sorry you are on your on there. LOL
Once I had my hair colored with the Browns (E31, E35, E37) I went over them with an orange marker (I think it was YR21?)
Just the browns on this one.
Same browns here too, just more of the lighter shade. 
I am working on some projects using some new rubber, I can hardly wait to share them with you!!
Until later~

Tuesday, August 17, 2010

Whoa, that is one bright card

Yea, I have a BRIGHT card to share today.  This card reminds me of the recipient- last year for her prom she wore a lime green and hot pink gown with hot pink high top tennies. LOL She is just that kind of girl!! LOL
The front of the card was cut almost in half before the image was attached.

Here you get a peek of the inside of the card. When the card is closed the verse is hidden by the cupcake, but you can see the sentiment in the lower right corner. (Didn't I warn you this one was bight?) =)
Thanks for stopping by!!
Until later~

Monday, August 16, 2010

Howdy Cowboy

I am working on Vacation Bible School follow-up. We had 20 boys and girls become followers of Jesus Christ during Bible school in July, I found some booklets I want to send to them, so I needed some cute cards too. =)
Our theme was Saddle Ridge Ranch- so what could be more perfect for my cards than this cute little cowboy?!
(He is from TAC's Wild West. Sadly he was retired in June.)
 Because I needed 20 of them I kept them pretty simple. The kraft cardstock gives the cards a "rugged, well-worn" feel. I used white cardstock for the image, I love how that really makes the image "pop." I used a boat load of Copics  to color the image. (Not really a BOAT LOAD, just a boat load according to my hubby. LOL He may tease me about how many Copics I have adopted- but he is the reason I have so many!!  He is the biggest enabler!! LOL)
Ok, enough yakking about my little card, so here it is......................
Thanks so much for stopping by!!
Until later~

Sunday, August 1, 2010

More Encouragement

Another Encouragement card, or two. LOL Same card- except a boo-boo required a little fancy work to cover on one. The bird image and sentiment are from The Angel Company, squigglies are from my stash.
Thanks for stopping by!!
Until later~

Saturday, July 31, 2010

Encouragement card take 2

I mentioned in my last post that I have been working on Encouragement cards. Well, this time I am doing things a bit differently, instead of mass producing a dozen of the same card I am only making 2 of each. (Tip- when making cards, it is just as easy to make two as it is one. After all a standard A2 card is HALF of a sheet of 8.5"x11" cardstock. If you don't need two at one time you can file one away for later.)


Following my own tip- I now have 2 of these cards to mail to friends. =) As you can see, Clean and Simple (CAS) is still my style. And as you can also see, CAS does not have to be boring! LOL (CAS also makes mailing easy too. No worrying about extra postage!! hee hee)
 I have used stamps from 4 different stamp companies on this one. Don't be afraid to mix and match!! The sentiment is another one for me to always remember- Don't tell God how big your problems are, tell your problems how big God is. A perfect encouragement sentiment.
Have a great day!!
Thanks for stopping by!!
Until later~

Tuesday, July 6, 2010

Care for a little Sushi

I have been taking a Copic Card class at my Local Scrapbook Store. I have learned quite a bit about using my Copics, and I have made some cute cards along the way. In June the class was on coloring water and glass, sadly I missed that class. Karrie also demoed the Copic Airbrush technique, I hope she demos this again!!
She chose the Sushi stamp set and showed how you can manipulate the stamp to create other shapes.
Two cute little fishies in a round little fishbowl.


Here the fishbowl was stretched out to form a jar shape. (Hunter says it looks like a soda can. LOL)
The fish were "fussy cut"  and pop dotted.


Here is where the airbrush technique was used. (After coloring my fishes I used the Orange Spica Pen to give them a little shine.)

Thanks for stopping by!!
Until later~

Thursday, June 17, 2010

Bright and cheery

 Here in Ohio we have had had so much rain, and the humidity has been just awful. With all the darkness I was more than happy to create my own little bit of brightness. =) I love the colors used for this Get Well card. I hope it brings a smile to my friend Kristie's face. She had a hip replaced this week and I am sure she would appreciate your prayers for a speedy recovery.

LOL, didn't I warn you it was bright?! :-D
Stamps- Hero Arts Big and Small flowers
Cardstock- PTI Raspberry Fizz, Spring Rain and New Leaf
Ink- Memento Tuxedo black
Copics-


Don't they look purty
I used the same stamped flower layer to make a Sympathy card too. It is on it's way to NC, so I don't have a picture of it. I used a monochromatic color scheme for that one. Here are the Copics I used for this one-

The Sympathy card went to my Aunt. She lost a 23 year old grandson in March, my mom (her sister) last month, and a 47 year old son last week.  My prayers go out to her and her family.
Thanks for taking a look!!
Until later~

Thursday, May 27, 2010

Another Robot card

This is the last card we made during May's Copic card class at Pizazz It! This as another really cute design- I like how the card front is cut short and the image placement. Again we used the tip to tip method for shading, and on this one we colored the ribbon with the Copics. (The ribbon started out as a yellow/white gingham!!)
Stamp- Stampendous Robot friends
Copics- B41, B45, C1, C4,RV11, YR02, 0, E57
Thanks for stopping by!!
Until later~ 

Wednesday, May 26, 2010

Robot cad #2

This is the second card from the monthly Copics card class at my LSS. I *think* this one is my favorite. (It reminds me of Hunter. He recently has been on a robot kick. He saved empty boxes and built a robot by himself. He said his invisible robot went to soccer with him on Thursday. LOL)
 The gears were cut from designer paper, I think they "make" the card.
Stamp- Stampendous Robot friends
Copics- B41, B45, C1, C4,RV11, YR02, 0, E57
Thanks for stopping by!!
Until later~